
Introduction to snapcraft
by Igor Ljubuncic on 16 May 2019
First steps are always hard, especially in technology. Most of the time, you need a primer, just the right dose of knowledge, to get started with a platform. This tutorial and upcoming sequels are designed to provide developers with simple, clear and effective tips and tricks on how to build and publish their applications as snaps. In today’s guide, we will learn more about snapcraft, the innovative, flexible command-line tool for developing snap packages.
What are we going to learn today?
Our agenda for today will include:
- Before you get started…notes & prerequisites.
- Overview of the snap system – basic concepts and components.
- Build environment setup – snapd and snapcraft installation.
- Overview of snapcraft.yaml – what it is and what it does.
- Overview of the snap application build.
- Overview of the snap file format.
- Overview of the snap publication process.
- Some simple examples.
Notes & prerequisites
Before we begin, there are a few small things you should know:
- This tutorial is a part of a gradually progressive series. Some terms may look vague at this point. They will be explained in detail in later guides.
- You should treat each part in the series as a building block for the next installment. It is advisable to follow the tutorials in sequential order to get the best understanding of the tools and concepts presented here.
Basic concepts
To make this tutorial easier to follow and understand, let us first define several concepts.
- Snaps are confined, standalone Linux applications bundled with all the necessary dependencies to run independently. They differ from the traditional Linux applications in that they do not rely on the system libraries.
- Snaps are isolated from the system.
- Snaps are updated automatically and safely. The updates are transactional.
- Snaps come with multiple release channels that allow flexibility in software testing.
- Snaps are available in the Snap Store, allowing out of the box discovery by millions of users.
- Snaps are built using the snapcraft command line tool.
Major components
The Snap system consists of several major components:
- Snapd is a background service that allows users to install and run snaps.
- Snap is the userspace component of the snapd service. For instance, snap install <foo> will install the application named <foo> from an online store called the Snap store.
- The Snap Store is a central repository of snap applications. If offers security and cryptographic signatures. The store contents are available to any system running snapd. The store features release channels, which allow multiple versions of the application to be available at the same time. Developers who want to publish their applications as snaps need to register for a free account in the store.
- Snapcraft is the command line tool that allows developers to build and publish their applications as snaps.
Build environment setup
You may want to practice while reading this tutorial. To that end, please make sure you have the following.
- A Linux system with snapd service installed. While snaps are available on many Linux distributions, it is easiest to practice and run snaps on the Ubuntu family. A standard Ubuntu 18.04 instance is the most convenient way to do so. Once you have snapd installed, you can install the snapcraft tool.
snap install snapcraft
- We also need to install multipass, which is used by snapcraft in the background to create isolated build environment instances inside (Ubuntu) virtual machines. The build process is transparent to the end user.
snap install multipass
- Some knowledge of the Linux command line.
- Some basic familiarity with the YAML language syntax.
Snapcraft capabilities
Let’s start with an overview of snapcraft and its capabilities.
Snapcraft is the command line tool that allows developers to build and publish their applications as snaps, in the snap file format. Snaps are created as the final artifact of the build process, with packages bearing a .snap extension. The snap file format is a single compressed SquashFS filesystem. It includes the application code and declarative metadata, which is interpreted by the snapd service to set up a secure sandbox for that application.
Snapcraft commands
Snapcraft supports a wide range of commands, designed to help developers start their project, build their applications, upload these applications to the online snap store, and publish them to the end user. Just to give you more context, some of these commands include:
build       Builds artifacts based on the snapcraft.yaml file.
clean       Remove content - cleans downloads, builds or…
init        Initializes a snapcraft project.
push        Pushes a snap to the online snap store.
register    Registers a snap with the online snap store.
snap        Create a snaps.
And many more.
Where does it all start?
Snapcraft builds applications based on declarations written in a file called snapcraft.yaml.
Snapcraft.yaml is a configuration file written in the YAML language, with stanzas defining the application structure and behavior. When snapcraft runs and parses this file, it will use the declared information to build the snap.
Developers coming from the traditional Linux world will find it easier to relate to snapcraft.yaml as being somewhat similar to a Makefile or an RPM spec file. Some familiarity with the YAML language syntax is helpful in understanding the declarations and logic in the snapcraft.yaml files.
Snapcraft.yaml
You can create the snapcraft.yaml file manually in your project directory, or you can run the snapcraft init command, which will create a template file you can then populate with the required information.
snapcraft init
A minimal valid snapcraft.yaml file that can be built into a working snap requires three stanzas: metadata, confinement level, and build definition.
Let’s illustrate this with an example. Below, you can see a complete snapcraft.yaml file contents for an application called wethr, a command line weather tool. We will now look at each section of the code separately and learn what it does.
name: wethr
version: "1.4.0"
summary: Command line weather tool.
Description: |
  Get current weather.

confinement: strict

base: core18

apps:

  wethr:

    command: wethr

    plugs:

      - network

parts:

  wethr:

    plugin: nodejs

    source-tag: "v1.4.0"

    source: https://github.com/twobucks/wethr.git
Metadata
Several mandatory fields define and describe the application – name, version, summary and description. These fields allow end users to find snaps and install them.
name: wethr
version: "1.4.0"
summary: Command line weather tool.
Description: |
  Get current weather.
Let’s examine these fields in more detail:
- Name – A string that defines the name of the snap. It must start with an ASCII character and can only use ASCII lowercase letters, numbers and hyphens. It must be between 1 and 40 characters in length. The name must be unique in the Snap Store.
- Version – A string that defines the version of the application to the user. Max. length is 32 characters. You can also use ‘git’ for the version qualifier. By specifying ‘git’, the current git tag or commit will be used as the version string. Please note that versions carry no semantic meaning in snaps.
- Summary – A string that briefly describes the application. The summary can not exceed 79 characters. You can use a chevron ‘>’ character or a pipe ‘|’ character in this key to declare a multi-line summary.
- Description – A string that describes the application. You can use multiple lines. There is no practical limitation on the length of this key.
| Field | Definition | Type | Length | Note |
|---|---|---|---|---|
| Name | Name | String | 1-40 | Unique |
| Version | App version | String | 1-32 | No semantic meaning |
| Summary | Brief | String | 1-79 | – |
| Description | Full | String | High | – |
When the application is built with snapcraft, this metadata will be made available to users. Information about additional directives and their syntax is available in the snapcraft YAML reference documentation.
Confinement level
By design, snaps are confined and limited in what they can do. This is an important feature that distinguishes snaps from software distributed using the traditional repository methods. The confinement allows for a high level of isolation and security, and prevents snaps from being affected by underlying system changes, affecting one another or affecting the system.
Different confinement levels describe what type of access the application will have once installed on the user’s system. Confinement levels can be treated as filters that define what type of system resources the application can access outside the snap.
Confinement is defined by general levels and fine-tuned using interfaces. We will discuss interfaces later in the series.
There are three levels of confinement:
- Strict – This confinement level uses Linux kernel security features to lock down the applications inside the snap. By default, a strictly confined application cannot access the network, the users’ home directory, any audio subsystems or webcams, and it cannot display any graphical output via X or Wayland.
- Devmode – This is a debug mode level used by developers as they iterate on the creation of their snap. This allows developers to troubleshoot applications, because they may behave differently when confined.
- Classic – This is a permissive level equivalent to the full system access that traditionally packaged applications have. Classic confinement is often used as a stop-gap measure to enable developers to publish applications that need more access than the current set of permissions allow. The classic level should be used only when required for functionality, as it lowers the security of the application.
| Access type | Strict | Devmode | Classic |
|---|---|---|---|
| Access to network | N | Y | System |
| Access to home dir | N | Y | System |
| Access to audio | N | Y | System |
| Access to webcam | N | Y | System |
| Access to display | N | Y | System |
| Used for | Preferred | Troubleshooting | Stopgap measure |
| Other | Interfaces override | – | Requires review |
Classically confined snaps are reviewed by the Snap Store reviewers team before they can be published. Snaps that use classic confinement may be rejected if they don’t meet the necessary requirements.
If we look at the wethr example, we define the confinement level as strict:
confinement: strict
Bases
In general, snaps cannot see the root filesystem on end user systems. This prevents conflict with other applications and increases security. However, applications still need some location to act as the root filesystem. They would also benefit from common libraries (e.g. libc) being in this root filesystem rather than bundled into each application.
The base keyword specifies a special kind of snap that provides a minimal set of libraries common to most applications. It will be mounted as the root filesystem for your application.
The core18 base is recommended.
base: core18
Build definition
The build definition stanza consists of several declarations on how the application is going to be built. If we look at the wethr application example, the build definition consists of the following:
apps:
  wethr:
    command: wethr
    plugs:
      - network
parts:
  wethr:
    plugin: nodejs
    source-tag: "v1.4.0"
    source: https://github.com/twobucks/wethr.git
Build definition – apps
Let’s look at the first part of the YAML code:
apps:
  wethr:
    command: wethr
    plugs:
      - network
apps: defines the application(s) that are going to be part of the snap. The wethr example has a single application – wethr. Other snaps may have multiple sub-applications or executables.
wethr: defines a block for the wethr application.
command: defines the path to the executable (relative to snap) and arguments to use when this application runs.
plugs: is a new concept that we have not yet discussed. It will be explained in more detail later in the series. For the time being, we will go with a simplified description. In this example, the declaration specifies that the wethr application will be allowed access to the network interface, which is not available by default under strict confinement. This allows the wethr snap to override the strict confinement and provide network access.
Build definition – parts
Let’s take a closer look at the second part of the YAML code, aptly named parts.
parts:
  wethr:
    plugin: nodejs
    source-tag: "v1.4.0"
    source: https://github.com/twobucks/wethr.git
parts: defines what sources are needed to assemble your app. Parts can be anything – programs, libraries, or other needed assets. We then further define how the wethr application should be built.
plugin: defines the use of an existing tool that will perform various language-specific commands in the background. For example, the nodejs plugin create parts that use Node.js and/or the JavaScript package manager npm.
source-tag: defines a specific tag for source repositories under version control. This plugin will then look for the source with the specific tag and try to obtain the necessary data for the application build.
source: defines the URL or a path of the application code that needs to be downloaded for the build. It can be a local or remote path, and can refer to a directory tree, a compressed archive or a revision control repository.
Application build process
Once you have a complete snapcraft.yaml file, you can build it.
The best way to start a new build is with a clean build environment. This ensures there are no library or dependency conflicts in your build setup, and that all snaps are built against the same common baseline.
This will guarantee that your snaps can run on all available snap platforms without any errors. To build your snap in a clean build environment, run:
snapcraft
This command will start an Ubuntu 18.04 minimal install virtual machine instance via multipass, download the necessary packages, build the snap, save the final artifact in your work directory, and then stop the virtual machine. The virtual machine will not be deleted, and it will be reused for re-builds of the snap, in case you require it.
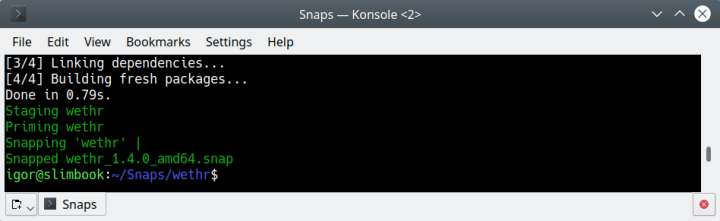
Snap created
You may encounter errors during the build process, such as invalid syntax, missing libraries, or your snap may not work correctly. We will learn more about the steps to understand and troubleshoot these later in the series. For the time being, let’s assume that our snap builds correctly and without any errors.
If the build is successful, you will have a file with the .snap extension in your work directory.
Snap file format
To better understand snaps, let’s take a closer look at the snap file format. Each snap is a single SquashFS filesystem containing the application code and metadata. You can unpack the snaps using the unsquashfs command or by mounting a snap as a loopback device.
unsquashfs <file>.snap
mount <file>.snap <mount point> -t squashfs -o loop
The contents of the extracted or mounted snap will resemble a typical Linux filesystem. There will be directories like bin, lib, usr and others. There will also be a command-<snap name>.wrapper file, which defines the snap environment under which the snap will run.
drwxr-xr-x 8 igor igor 4096 Dec  5 12:48 ./
drwxrwxr-x 4 igor igor 4096 Dec  5 12:48 ../
drwxr-xr-x 2 igor igor 4096 Dec  5 12:48 bin/
-rwxr-xr-x 1 igor igor   61 Dec  5 12:48 command-foo.wrapper*
drwxr-xr-x 3 igor igor 4096 Dec  5 12:48 etc/
drwxr-xr-x 4 igor igor 4096 Dec  5 12:48 lib/
drwxr-xr-x 3 igor igor 4096 Dec  5 12:48 meta/
drwxr-xr-x 3 igor igor 4096 Dec  5 12:48 snap/
drwxr-xr-x 6 igor igor 4096 Apr 16  2018 usr/
Again, to make this easier to understand for developers coming from the traditional world, this is somewhat similar to extracting a package (like an RPM), and running an application from a relative path by loading the necessary libraries using the $LD_LIBRARY_PATH environment variable. Snaps use the $SNAP* variables to define and determine their “virtual” environment:
- $SNAP (install path, RO)
- $SNAP_DATA (path in /var, RW)
- $SNAP_USER_DATA (path in /home, RW)
And others.
A snap that has been published in the snap store will have several additional files, like the assert file, desktop launcher and others. We will discuss these in more detail later in the series, once we learn how to use plugs and interfaces.
Publishing a snap
Now we are ready to publish our snap. The process consists of the following:
- Create your developer account at snapcraft.io.
- Register your app’s name (above or the command line).
- Release your app.
snapcraft login
snapcraft register
Once you have completed the first two steps, you can upload the snap to the store.
snapcraft push --release=<channel> <file>.snap
The second command will upload the snap file into the store. However, before you run this command, we need to talk a little bit about the different release channels.
Snap Store channels
The Snap Store comes with a very high level of release management flexibility by using multiple channels, which allow developers to publish their applications in a staged, controlled manner. The channels can be treated as a multi-dimensional version control. Each channel consists of three components:
<track>/<risk>/<branch>
- Track – represents a progressive potential trade-off between stability and new features.
- Risk – enables snap developers to publish multiple supported releases of their application under the same snap name.
- Branch – are optional and hold temporary releases intended to help with bug-fixing.
A typical channel will look something like:
--channel=latest/edge
Track
All snaps must have a default track called latest. This is the implied track unless specified otherwise. A track contains releases based on the developer’s versioning convention. A track could be used to track minor updates (2.0.1, 2.0.2), major updates (2.1, 2.2), or releases held for long-term support (3.2, 4.1).
Risk
This is the most important aspect of the channels. It defines the readiness of your application, much in the same way you would version any application – alpha, beta, RC, GA, etc. The risk levels used in the snap store are: stable, candidate, beta, and edge.
Snaps are installed using the stable risk-level by default. Installing from a less stable risk-level will typically mean more frequent updates.
You can also use –stable, –candidate, –beta, –edge options instead of writing the full channel declaration. For instance, –stable is equivalent to –channel=stable or even –channel=latest/stable.
End users of snap have the option to switch between different channels for their own convenience.
Branch
Branches are optional. They allow the creation of a short-lived sequences of snaps that can be published on demand by snap developers to help with fixes or temporary experimentation.
Branch names convey their purpose, such as fix-for-bug123, but the name isn’t exposed in the normal way, such as with snap info. Instead, they can be tracked by anyone simply knowing the name. After 30 days with no further updates, a branch will be closed automatically.
Upload your snap
Now that we understand the concept of channels, we can upload our snap.
Please note you should NOT upload your snap to the stable channel right away. You should do the publication in a staged manner, and allow for sufficient testing, to make sure the snap application is stable and works correctly before it is promoted into the stable channel.
snapcraft push --release=beta <file>.snap
The Snap Store will run several automated checks against your snap. There may also be a manual review, depending on how you have built your snap (like classic confinement). If the checks pass without errors, your snap will be available in the store.
You are encouraged to create a compelling page for your application, to attract users. The use of an accurate description, high-quality logo and screenshots can all help make your application more visible and appealing.
And that’s it. Congratulations, you’ve just successfully published your first snap!
Conclusion
Today, we learned about snaps as a concept and technology. We learned about the basic architecture of snaps and its components. We delved a little deeper into the snapcraft internals, focusing on the commands, the snapcraft.yaml syntax and how to build and publish your snaps.
We touched on the important concepts of confinement levels, clean build environment, and channels. We used a simple example of a command-line weather application in the build process. The next step is to expand on the build definitions, and make more complex snaps.
Indeed, snapcraft has many useful components, and through the series, we will discuss them, including interfaces, plugins, hooks and health checks, and how to develop snaps with different languages, like Python, Electron, Go, and others.
Meanwhile, if you’re interested, please take a look at the following blog posts, as they provide additional details and insight into the snap build process:
Zero to Snap – Rev up your packaging
Zero to Hero – Snap me up before you GO
Publish Your Unity Games in the Snap Store
And of course, we welcome feedback and ideas, so if you like, please join the discussion forum.
Photo by Barn Images on Unsplash.